

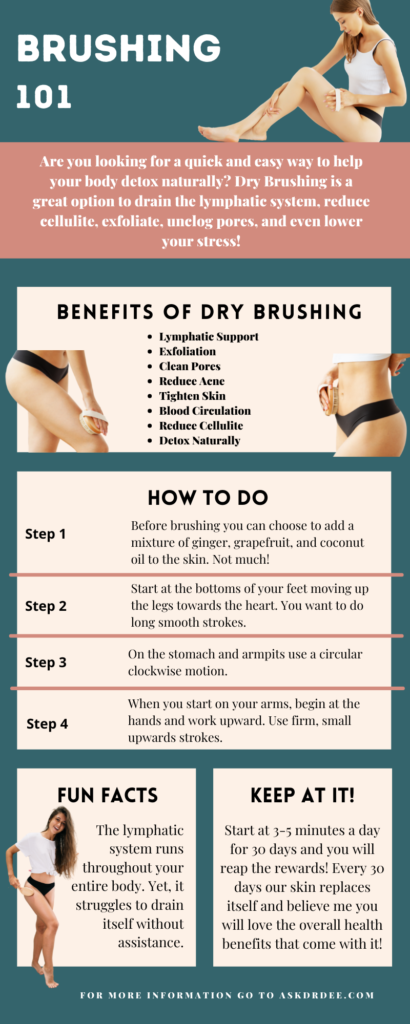
You may have heard of dry brushing, and you may know you want to do it as part of your skincare routine. What you may not know is what the overall benefits are of this technique. You may know that it removes dry skin, but you may not know what dry skin brushing offers that you can’t get from other dry skin removal methods. Here are some of those benefits to consider about your new dry skin brushing routine.
The Power of Gut Health
As a doctor, I cannot tell you how many conversations I have daily about autoimmune disorders. Most of my clients have been struggling with an undiagnosed autoimmune disease for years. Others have been diagnosed and are looking for ways to reduce their symptoms. As such, one of the very first things we do is talk about digestive health. Here’s the thing, most people don’t realize that more than half of your immune system is inside of your digestive tract! That’s right, which means when your digestive system has become compromised, your immune system has too! This means that by supporting your digestive health, you are boosting your immunity all in one. I don’t know about you, but I love when I get a two-for-one deal.
Tips to Get More Bang For Your Buck!
If you are new to dry skin brushing, you may not be sure what to do to make it work for your skin or in your routine. In fact, you may become discouraged if you aren’t sure what types of brushes to use or how to use them properly. Before you become too discouraged, there are a few tips and tricks you can consider and apply to your dry skin brushing routine. Here are just a few to get you started and possibly answer some of your questions.
Types of Brushes to Use
The key point to keep in mind is that you need to stay away from synthetic brushes. The ideal dry skin brush is made of natural bristles that are soft. When you think of the softness and quality of the brush, think of something like a makeup brush and how it feels if it is too coarse. It can hurt and it can feel like it is actually cutting into your skin. A high-quality brush made of natural bristles will not have this same effect and is gentle enough to use daily if you need to. There are brushes specifically for dry skin brushing, but if you are on a budget or have no health food store near you that sells the brushes, consider a natural brush suitable for sensitive scalps or children and toddlers. This would be soft enough to get you started.

Location of your Dry Skin Brushing
When you start your dry skin brushing, make sure you are doing it in the shower or bath. You don’t want to do it in the bathroom, bedroom, or another part of the home. You also don’t want to do it just before sun tanning in a tanning bed or right after a workout. Ideally, your skin should be dry and have no lotions or sweat. You want the dry skin to go down the drain and not be on your clothing, your household items, or anywhere in the room. This is for sanitary reasons, but also to help you get in the routine of bathing following your dry skin brushing so you can remove any skin that may be left and cleanse your pores.
Creating a Dry Skin Brushing Routine
You need to create a dry skin brushing routine that not only works in your schedule but also helps to ensure you will stick to it. Ideally, you will be doing a dry skin brushing session at least twice to three times a week. You can reduce or increase the frequency depending on what you feel your skin needs. If your skin feels too raw then reduce the number of times you are doing this per week. If your skin is still heavily dry, then increase the number of times you do it per week.
Remember, the cost of the brush is not as important as the quality. You can find a variety of dry skin brushes in local health stores or online for a small fee that works very well. Don’t let pricing and manufacturer sales talk discourage you. Stick to the tips and tricks here and you will be well on your way to comfortable and beneficial dry skin brushing.

No Time Like The Present
Keeping your body free of toxins and free radicals is necessary to maintain a healthy life and a healthy mind. Add any of these foods to your regular diet to help your body with its critical detoxifying processes. If you are looking for a safe and all-natural way to detox your body at home be sure to check out my Balancing Abundance Program. Because detoxing is so important and realistically everyone should be doing it on at least a seasonal basis I have taken the time to put together a program to help you do just that. Here’s the thing, I know working with me one-on-one can seem difficult to get into (due to limited space) and I wanted to be able to give everyone an additional solution that has no limits. You deserve to be happy, healthy, and successful at everything you do so here are some recipes to help set you up for success!
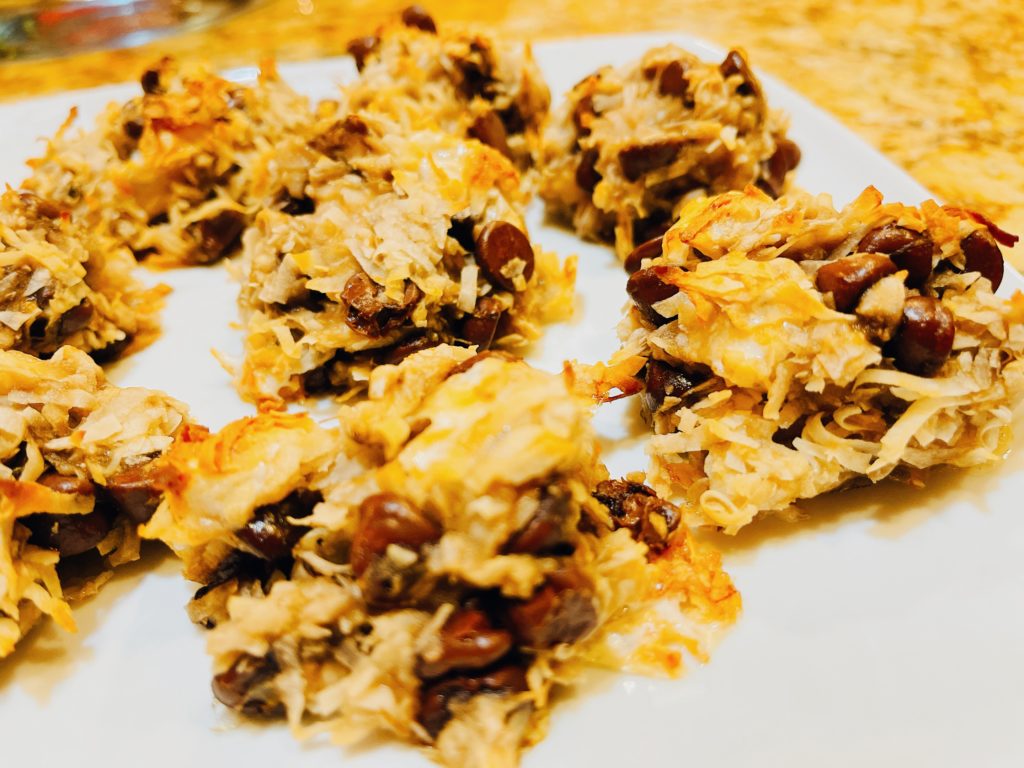
Banana Samoa Cookies
Gluten-Free Vegan Makes 8 Cookies
- 2 Ripe Bananas Mashed
- 1 3/4 Cups Shredded Coconut Flakes
- 1/2 Cup Vegan Dark Chocolate Chips
- 1/2 Cup Vegan Marshmallows
- 1/2 tsp Pure Vanilla
Directions:
Preheat the oven to 375 degrees. In a bowl, combine all ingredients and mix well. Once ingredients are combined, transfer to a baking sheet that has been pretreated with a non-stick option of choice. I use silicone mats because I can reuse them, and I don’t have to worry about adding any additional oils. Cookies will not expand very far when baked. However, to ensure structural stability, I suggest making smaller cookies. Bake for 10-15 minutes or until marshmallows are nice and toasty. Remove from heat and cool on the tray for 5 minutes before transferring to a wire rack to cool completely. They are great frozen too!
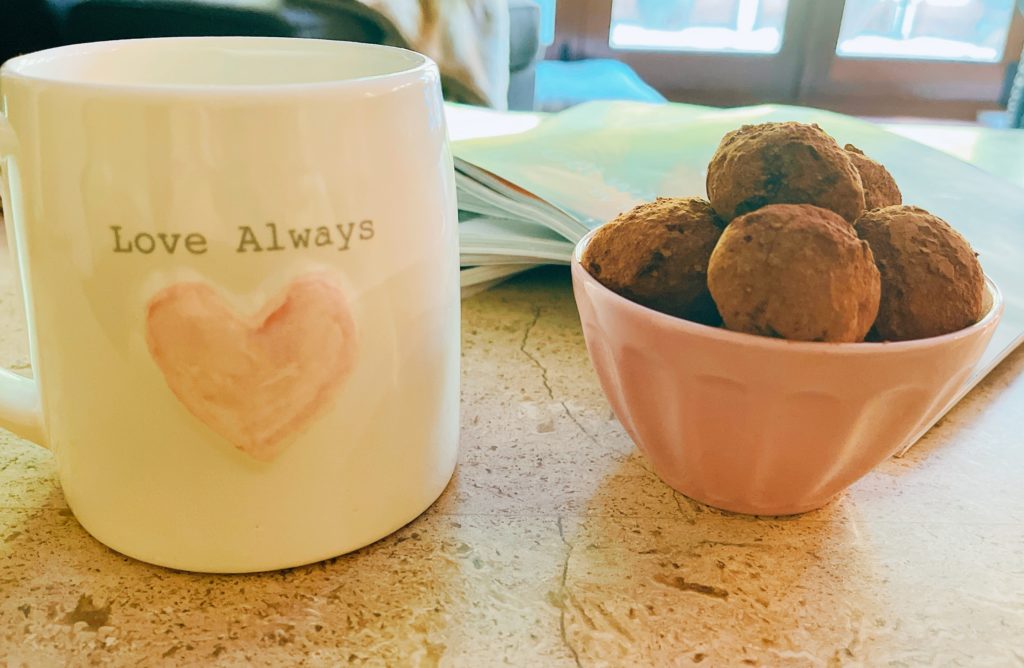
Chocolate Truffles
Gluten-Free Vegan Serves 12
- 9 ounces (1 1/2 Cups) Vegan Dark Chocolate Chips
- 7 TBsp Condensed Coconut Milk
- 1/2 tsp Pure Vanilla
- 1/4 Cup Cacao Powder
- 1 Scoop SNAP Beet Powder
Directions:
Using a double boiler melt chocolate, milk, and vanilla until combined. Once combined, remove from heat and let cool. Prep your next station before rolling into balls. Pull out two baking sheets with a non-stick preventative of choice. I like the silicone mats because they can be reused and I don’t have to worry about flavor changes. Combine cacao and beet powder to be poured out onto a dish that you can roll the truffles into. Next, with clean hands take 1 TBsp of the mixture and roll it into a ball. Once the ball is formed roll it into the powder and place it on a baking sheet. Repeat until all of the mixtures are gone. Place truffles into the fridge or freezer to set up (1-2 hours for fridge, 15-30 minutes for the freezer) and enjoy! Store in the fridge.

Broccoli Cheddar Dumpling Soup
Gluten-Free, Vegan Serves 6
- 2 Tbsp Extra Virgin Olive Oil
- 1 White Onion Minced
- 2 Tbsp Vegan Butter
- 3 Carrots Minced
- 2 Tbsp Chopped Fresh Thyme
- Sea Salt and Black Pepper to Taste
- 6-7 Cups Vegetable Broth
- 3 Cups Broccoli Florets
- 2 Bay Leaves
- 1/2 Cup Whole Fat Coconut Milk
- 1/4 tsp Nutmeg Ground
- 1 1/2 Cup Coconut Flour
- 1/4 tsp Cayenne Pepper
- 2 tsp Baking Powder
- 1 Cup Cashew Yogurt Plain Unsweetened
- 1/4 Cup Vegan Parmesan Cheese
- 1 Tbsp Chopped Sage
- 2 Cups Shredded Vegan Cheddar Cheese
Directions:
Melt the butter with the olive oil in a large soup pot over medium heat. Once the oil starts to shimmer add in onions and cook for 3-5 minutes. Next, add in the carrots and thyme. Season with salt and pepper and cook for another 5 minutes. Pour in the broth, broccoli, bay leaves, nutmeg, and cayenne, and bring to a boil. Cover and cook for 10-15 minutes or until the broccoli is tender. To make the dumplings, in a medium bowl mix the flour, baking powder, and a pinch of salt and pepper. Add yogurt, parmesan, and sage mix until just combined.
Remove bay leaves from the soup. Transfer 3/4 of the soup into a blender and blend until smooth. Return to the soup and return to a boil on medium-high heat. Drop a heaping tablespoon of the dough into the soup adding about 6 at a time. Cover and cook for 8-10 minutes or until the dumplings are cooked through and puffy. Remove dumplings and set them aside until ready to serve. Stir in milk and cheddar and continue cooking until melted. Add salt and pepper as needed. When ready to serve, pour into a bowl and top with dumplings.

Need A Hand?
A happy and healthy life is closer than you may think. We all have to deal with our health daily, and when we don’t feel our best, it shows. If you are tired of just making it through your day, you NEED to start investing in your health today! You are not alone on this journey. If you ever need any help, I am always here to do just that. Even if it is something as small as acting as a sounding board, do you have any questions or concerns I can help you with? Feel free to contact me directly at [email protected], or you can even book a one-on-one call with me. Be sure to subscribe to gain access to tons of free goodies and check back daily for more great recipes and information!